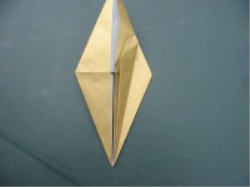
 Fold one of the four flaps
in two. Note that the sharp point is at the open bottom side.
Fold one of the four flaps
in two. Note that the sharp point is at the open bottom side.
Fold one of the four flaps
in two. Note that the sharp point is at the open bottom side.
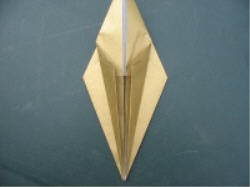 And the same at the other
side.
And the same at the other
side.
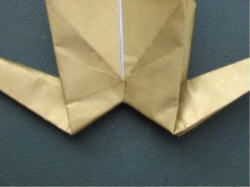
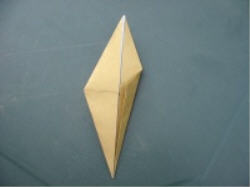 Tunt the model upside down,
and do the same at the bottom. Right side to the middle...
Tunt the model upside down,
and do the same at the bottom. Right side to the middle...
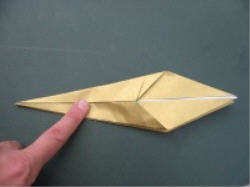 And left side to the middle, like this. (Here, rotated 90 degrees.
 Now take the left point that folds downward, and turn it into the part of the head, by folding it such that it points in a more or less horizontal direction.
This is a reverse fold: the point goes between the two wings. When doing this, some paper that was inside the model now shows at the outside, and some paper that is outside the model is at the inside.
Again, once you see what happens, it is not complicated.
 The fold must be made
as high as possible. Here you see it finished.
The fold must be made
as high as possible. Here you see it finished.
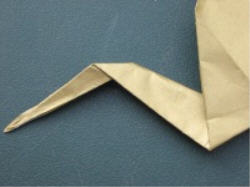
 Closeup.
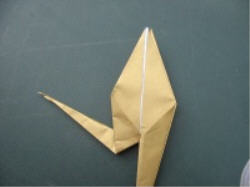
 Make the same type of fold
with the other point.
Make the same type of fold
with the other point.
 Closeup. Note that both of the folds we just made were reverse folds: the fold that was vertical and now is somewhat horizontally was `reversed' in the sense that
it has the other side out. This is not nice when you are not folding with paper, but e.g., with certain types of plastic.
Closeup. Note that both of the folds we just made were reverse folds: the fold that was vertical and now is somewhat horizontally was `reversed' in the sense that
it has the other side out. This is not nice when you are not folding with paper, but e.g., with certain types of plastic.
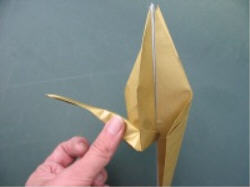
 Now, we made a second
reverse fold in one of the two points, and thus form the head.
Now, we made a second
reverse fold in one of the two points, and thus form the head.
 A closeup. This looks exactly the same when you put the model upside down: we have to make a reverse fold and not a normal fold here.
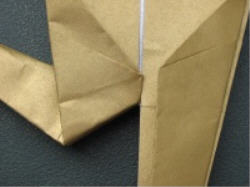
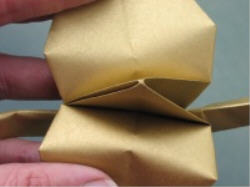 Open the wings. You can do two things.
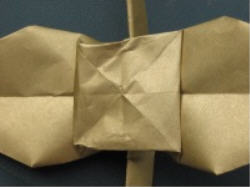 Option I:
Spread the top to form a square at the top of the model. It looks like this from above.
Option I:
Spread the top to form a square at the top of the model. It looks like this from above.
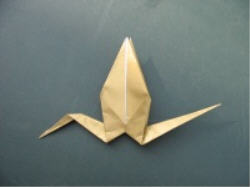
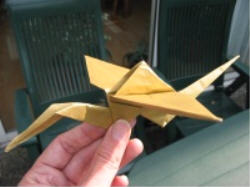
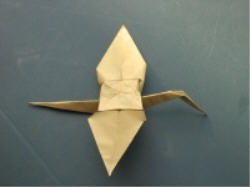 Your crane looks like this.
 And like this from the side.
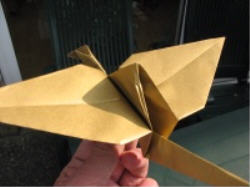 Option II:
We can also just
fold the wings aside, but leave the top as a point.
Option II:
We can also just
fold the wings aside, but leave the top as a point.
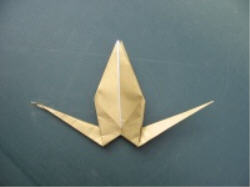
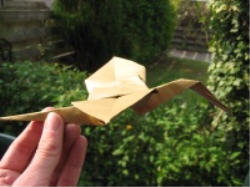
 And there we have the crane, who now looks like this.
I hope you enjoyed folding this crane.