The Base
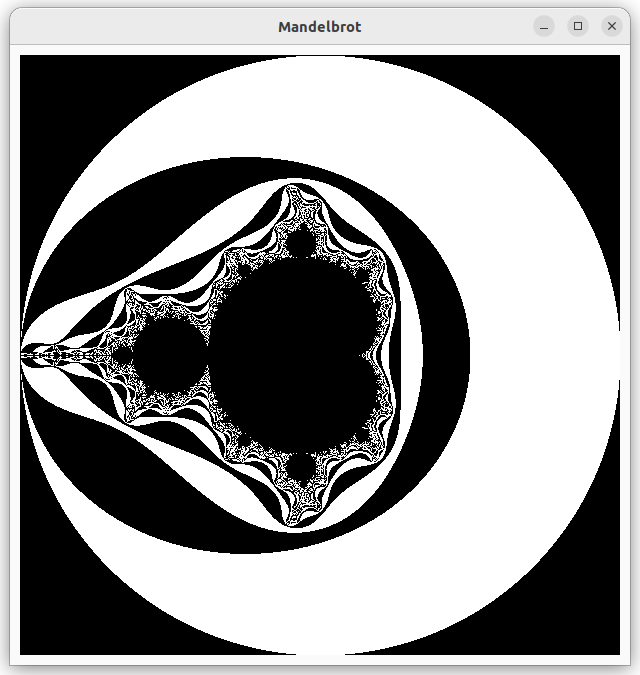
The code of this stage can be found on branch 0-base. In this stage we will make an application that looks like this:
 .
.
This is not meant to be a tutorial about mathematics, so we will not go into detail about the mandelbrot set. If you are interested, you can find a lot of information on the web. For our purposes it is enough to know that we have a function from the mathematical x-y-plane to positive integers. The integer indicates how many iterations we have to make before we reach a stop criterion, given a point in the plane. We may never reach this criterion, so we have a limit on the iteration depth. We will call this integer value the mandelvalue of a point in the plane.
The interesting part of the figure lies inside a circle around the origin with radius 2. Outside this circle, the stop criterion is reached in one step. In the picture above, we just see the complete circle. We use black and white for odd or even mandelvalues respectively.
The window will be used as a map that shows a part of the mandelbrot figure. In file mandel_image.rs we find the struct Mapping which deals with this. In a map, the scale is important. We define the scale as the width (or height) of the rectangle in the mathematical plane that corresponds to one pixel of the window. So, if we want to to see the interesting region of size 4x4 in 800x800 pixels, we should set the scale to 4/800=0.005.
The parameters cx and cy are the coordinates of the point that will be mapped to the center of the window. The parameters win_width and win_height give the size of the window in pixels. We talked already about the parameter iteration_depth, which decides how much detail is shown.
#![allow(unused)]
fn main() {
pub struct Mapping {
    pub cx: f64,
    pub cy: f64,
    pub scale: f64,
    pub win_width: usize,
    pub win_height: usize,
    pub iteration_depth: u32,
}
}
The GUI
Now let's focus onder the user interface in file gui.rs.
The entry point of the application is the function run:
#![allow(unused)]
fn main() {
pub fn run() -> glib::ExitCode {
    let app = Application::builder().application_id(APP_ID).build();
    app.connect_activate(build_ui);
    app.run()
}
}
The first line creates an Application. This uses a typical pattern where a struct has a builder function that creates a builder. The builder has functions to set parameters (which return the builder) and a function build which returns the struct that is built. In this case we only set a globally unique identifier for the application.
The second line calls the function connect_activate on the application that was just created. Functions that start withconnect_ deal with signals. They supply a function that will be called when a signal is emitted. In this case we supply the function build_ui for the activate signal. Notice that this function is not called now.
The third line hands control over to the app. It will start responding to events and emitting signals. Usually, it will emit the activate signal, which calls our build_ui function. But if another application with the same identifier is already running this will not happen. Then it brings that application to the foreground and shuts down itself.
So, let's move to the function that builds the user interface.
#![allow(unused)]
fn main() {
fn build_ui(app: &Application) {
    let canvas = DrawingArea::builder()
        .content_height(WIN_SZ0 as i32)
        .content_width(WIN_SZ0 as i32)
        .margin_start(10)
        .margin_end(10)
        .margin_top(10)
        .margin_bottom(10)
        .build();
    let image = make_mandel_image(&Mapping::new_for_size(WIN_SZ0));
    canvas.set_draw_func(move |_d, ctxt, _w, _h| mandel_draw(&image, ctxt));

    let window = ApplicationWindow::builder()
        .application(app)
        .title("Mandelbrot")
        .child(&canvas)
        .build();
    window.present();
}
}
We have a window with one element: a DrawingArea. In a drawing area we can draw arbitrary things with the cairo library. To create the drawing area, we use the builder pattern and add a width and height for the area, as well as some margins to make some space between the drawing area and the border of the window.
In the drawing area we will display an image. This image is made with the function make_mandel_image. We ask for an image with the same size as the draing area. The function returns an Option<ImageSurface>. The drawing area needs a function that draws something in the area. We set this function with set_draw_func. We pass it aclosure that captures the image we just created.
Next, we create an ApplicationWindow. We associate the application, passed to the function as a parameter, to the window. So, the application will remain alive while the window exists. We set a not very inspired title and make the drawing area the child of this window.
Finally we present the window, which means we show it.
The drawing function for the drawing area is:
#![allow(unused)] fn main() { fn mandel_draw(img: &Option<ImageSurface>, ctxt: >k::cairo::Context) { if let Some(img) = img { ctxt.set_source_surface(img, 0.0, 0.0) .expect("Expected to be able to set source surface"); ctxt.paint().unwrap(); } } }
If img is not None, we set the image as source and then paint it.
Unluckily, at the moment of writing the documentation of the rust cairo library is rather minimal. In this case, there is nothing. You can look at the C api for more information.
Making the Mandelbrot Image
As we want to focus on the user interface, we don't explain the code in mandel_image.rs in detail. We just highlight one point of interest.
The function make_mandel_image returns a Option<gtk::cairo::ImageSurface>.
An ImageSurface has a slice of bytes and an image format, which is used to identify the memory format of image data. In lib.rs we defined:
#![allow(unused)]
fn main() {
const IMG_FMT: gtk::cairo::Format = gtk::cairo::Format::Rgb24;
}
With Rgb24 each pixel is a 32-bit quantity, with the upper 8 bits unused. Red, Green, and Blue are stored in the remaining 24 bits in that order. The 32-bit quantities are stored native-endian. That is why in function fill_mandel_image you find color.to_ne_bytes() to convert a 32 bit color value to 4 bytes, which are then copied to image data.
For the rest, you can have a look at the code, which contains comments to explain things.