Attention, Please!
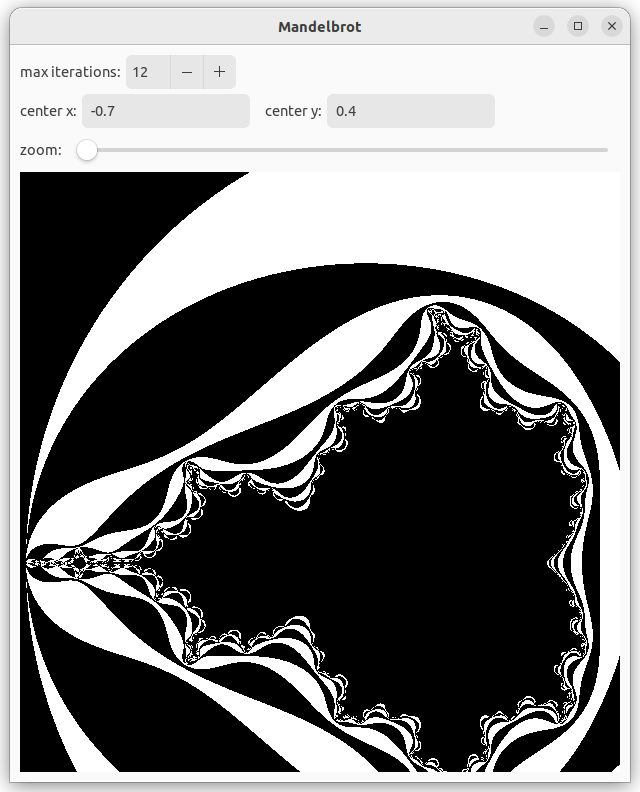
In this stage we will focus on focus. That is, we will make it possible to zoom in, shift the center and increase the computation detail. Below is a picture of the user interface and the image that is a bit zoomed, shifted and rendered with less detail. The code of this stage can be found in branch 2-parameters.
Changes to the GUI
We see that the window is divided in four rows: iterations, center, zoom and the drawing area. The rows are divided in one or more parts, e.g. a label and a user interface element. We will first focus on adding those elements and afterwards on adding actions.
Let's first look at the top row. It contains a label and a SpinButton.
#![allow(unused)]
fn main() {
    let iter_val = state.borrow().iter_depth();
    let iter_adj = Adjustment::new(iter_val, 10.0, 1000.0, 1.0, 0.0, 0.0);
    let iteration_button = SpinButton::builder().adjustment(&iter_adj).build();
    let first_row = make_row_box();
    first_row.append(&Label::new(Some("max iterations:")));
    first_row.append(&iteration_button);
}
The SpinButton is tied to an Adjustment, which is a numerical value with a current value, a minimum, maximum and step value and two page related values that are of no use in a SpinButton. They are set to zero here. The current value is taken from the state.
The row is a Box which is made with the following function:
#![allow(unused)]
fn main() {
fn make_row_box() -> gtk::Box {
    gtk::Box::builder()
        .orientation(gtk::Orientation::Horizontal)
        .spacing(5)
        .build()
}
}
It creates a horizontal row with elements being separated by at least 5 pixels.
The second row contains two labels and two text entry elements:
#![allow(unused)]
fn main() {
    let cx_value = gtk::Entry::builder()
        .text(&state.borrow().cx().to_string())
        .width_chars(15)
        .margin_end(10)
        .build();
    let cy_value = gtk::Entry::builder()
        .text(&state.borrow().cy().to_string())
        .width_chars(15)
        .build();
    let second_row = make_row_box();
    second_row.append(&Label::new(Some("center x:")));
    second_row.append(&cx_value);
    second_row.append(&Label::new(Some("center y:")));
    second_row.append(&cy_value);
}
We made sure to initialize the text with the center values in the state.
The third row conatins a label and a Scale.
#![allow(unused)]
fn main() {
    let zoom_adj = Adjustment::new(0.0, 0.0, 1000.0, 1.0, 0.0, 0.0);
    let zoom_bar = Scale::new(Orientation::Horizontal, Some(&zoom_adj));
    zoom_bar.set_hexpand(true);
    let third_row = make_row_box();
}
The Scale takes an Adjustment as well. The relation between the zoom value and the scale in the mapping is a bit complicated. We will see it later. The step value does not need to be an integer value here, so we could have chosen something different than 1.
We call set_hexpand to tell the Scale that we want to expand it to the full width of the box. In that way, we have maximal control over the slider.
The fourth row only contains the drawing area.
#![allow(unused)]
fn main() {
    let canvas = DrawingArea::builder()
        .content_height(WIN_SZ0 as i32)
        .content_width(WIN_SZ0 as i32)
        .vexpand(true)
        .build();
    state.borrow_mut().set_canvas(canvas.downgrade());
}
A change compared to the previous stage is the call to vexpand. The canvas will be in a vertical box and we need to tell it that the drawing area should occupy available vertical space. Try out what happens if you leave this out and resize the window.
We will need the canvas in some signal handlers. This is why we keep it in the state. But what is this downgrade function? Actually, all user interface elements are reference counted. When we put a Label (or an Entry or something else) in a Box, the box became co-owner of the label. To avoid the possiblity of cyclic ownership, we use a weak reference to the canvas.
Finally, we make the vertical box and add the rows to it.
#![allow(unused)]
fn main() {
    let content_box = gtk::Box::builder()
        .orientation(gtk::Orientation::Vertical)
        .spacing(5)
        .margin_start(10)
        .margin_end(10)
        .margin_top(10)
        .margin_bottom(10)
        .build();
    content_box.append(&first_row);
    content_box.append(&second_row);
    content_box.append(&third_row);
    content_box.append(&canvas);
}
We have a minimal vertical spacing between elements. We put the margins, that used to be around the canvas, around this box.
Actions
We need to associate actions with the new widgets.
#![allow(unused)]
fn main() {
    iter_adj.connect_value_changed(clone!(@strong state => move |a| {
        state.borrow_mut().set_iter_depth(a.value());
    }));
    cx_value.connect_changed(clone!(@strong state => move |e| {
        state.borrow_mut().set_cx(expect_float_value(e));}),
    );
    cy_value.connect_changed(clone!(@strong state => move |e| {
        state.borrow_mut().set_cy(expect_float_value(e));}),
    );
    zoom_adj.connect_value_changed(clone!(@strong state => move |adj| {
        state.borrow_mut().set_zoom(adj.value());
    }));
}
The connection to the signals follows the same pattern. Note that we use the macro clone from gtk::glib to clone the state. In the previous stage we did this explicitly. The annotation @strong means that we do a clone and get a strong reference. With @weak we would have obtained a weak reference.
#![allow(unused)] fn main() { fn expect_float_value(e: >k::Entry) -> Option<f64> { let t = e.text(); if let Ok(value) = t.parse::<f64>() { Some(value) } else { None } } }
The user can type text in the cx and cy widgets. That should be a floating point value, but you never know with users. That is why we have a function that tries to parse the text and returns an optional value.
Changes to the State
As we saw in the previous section, the actions are passed to function in the state. Here we describe what changes there.
#![allow(unused)]
fn main() {
pub struct State {
    mapping: Mapping,
    img: Option<ImageSurface>,
    canvas: WeakRef<DrawingArea>,
}

impl State {
    pub fn new() -> State {
        State {
            ...
            canvas: WeakRef::new(),
        }
    }
    pub fn set_canvas(&mut self, canvas: WeakRef<DrawingArea>) {
        self.canvas = canvas;
    }
}
Only the field canvas is new. It is initialized in new and set withset_canvas. We will see how it is used later on.
#![allow(unused)]
fn main() {
    pub fn iter_depth(&self) -> f64 {
        self.mapping.iteration_depth as f64
    }
    pub fn set_iter_depth(&mut self, value: f64) {
        let iter_depth = value as u32;
        self.mapping.iteration_depth = iter_depth;
        self.recompute_image();
    }
    pub fn cx(&self) -> f64 {
        self.mapping.cx
    }
    pub fn set_cx(&mut self, v_opt: Option<f64>) {
        if let Some(value) = v_opt {
            self.mapping.cx = value;
            self.recompute_image();
        }
    }
    pub fn cy(&self) -> f64 {
        self.mapping.cy
    }
    pub fn set_cy(&mut self, v_opt: Option<f64>) {
        if let Some(value) = v_opt {
            self.mapping.cy = value;
            self.recompute_image();
        }
    }
}
There are getters and setters for the maximum iteration value and the x and y mandelbrot coordinates of the center of the window. Those values are stored in the mapping. When they are changed, the image in the drawing area ahould be recomputed, so we call the function that takes care of that.
#![allow(unused)]
fn main() {
    pub fn set_zoom(&mut self, zoom: f64) {
        let scale = 1.035_f64.powf(-zoom);
        self.mapping.scale = 4.0 * scale / WIN_SZ0 as f64;
        self.recompute_image();
    }
}
The zoom value is exponentially related to the scale. The value 1.035 is chosen by trial and error. The maximum zoom value is 1000, and 1.035^1000 is about 9e14. Near that value, the figure starts to show blocks, because of approximation errors in the floating point computation.
#![allow(unused)]
fn main() {
    fn recompute_image(&mut self) {
        if let Some(img) = make_mandel_image(&self.mapping) {
            self.set_img(img);
        }
    }
    fn set_img(&mut self, img: ImageSurface) {
        self.img = Some(img);
        if let Some(canvas) = self.canvas.upgrade() {
            canvas.queue_draw();
        }
    }
}
}
The function recompute_image is called whenever the mandelbrot image needs to be recomputed. It calls make_mandel_image and sends the result to set_img. The last line of on_resize is also replaced by a call to this function.
The function set_img sets the image and then notifies the drawing area that it needs to redraw. Note that we need to convert the weak reference canvas to a strong reference before we can do that. In the previous stage we got away with not calling queue_redraw, probably because a resize event already took care of that. You can try to leave out this call and see what happens, or rather, what doesn't happen.